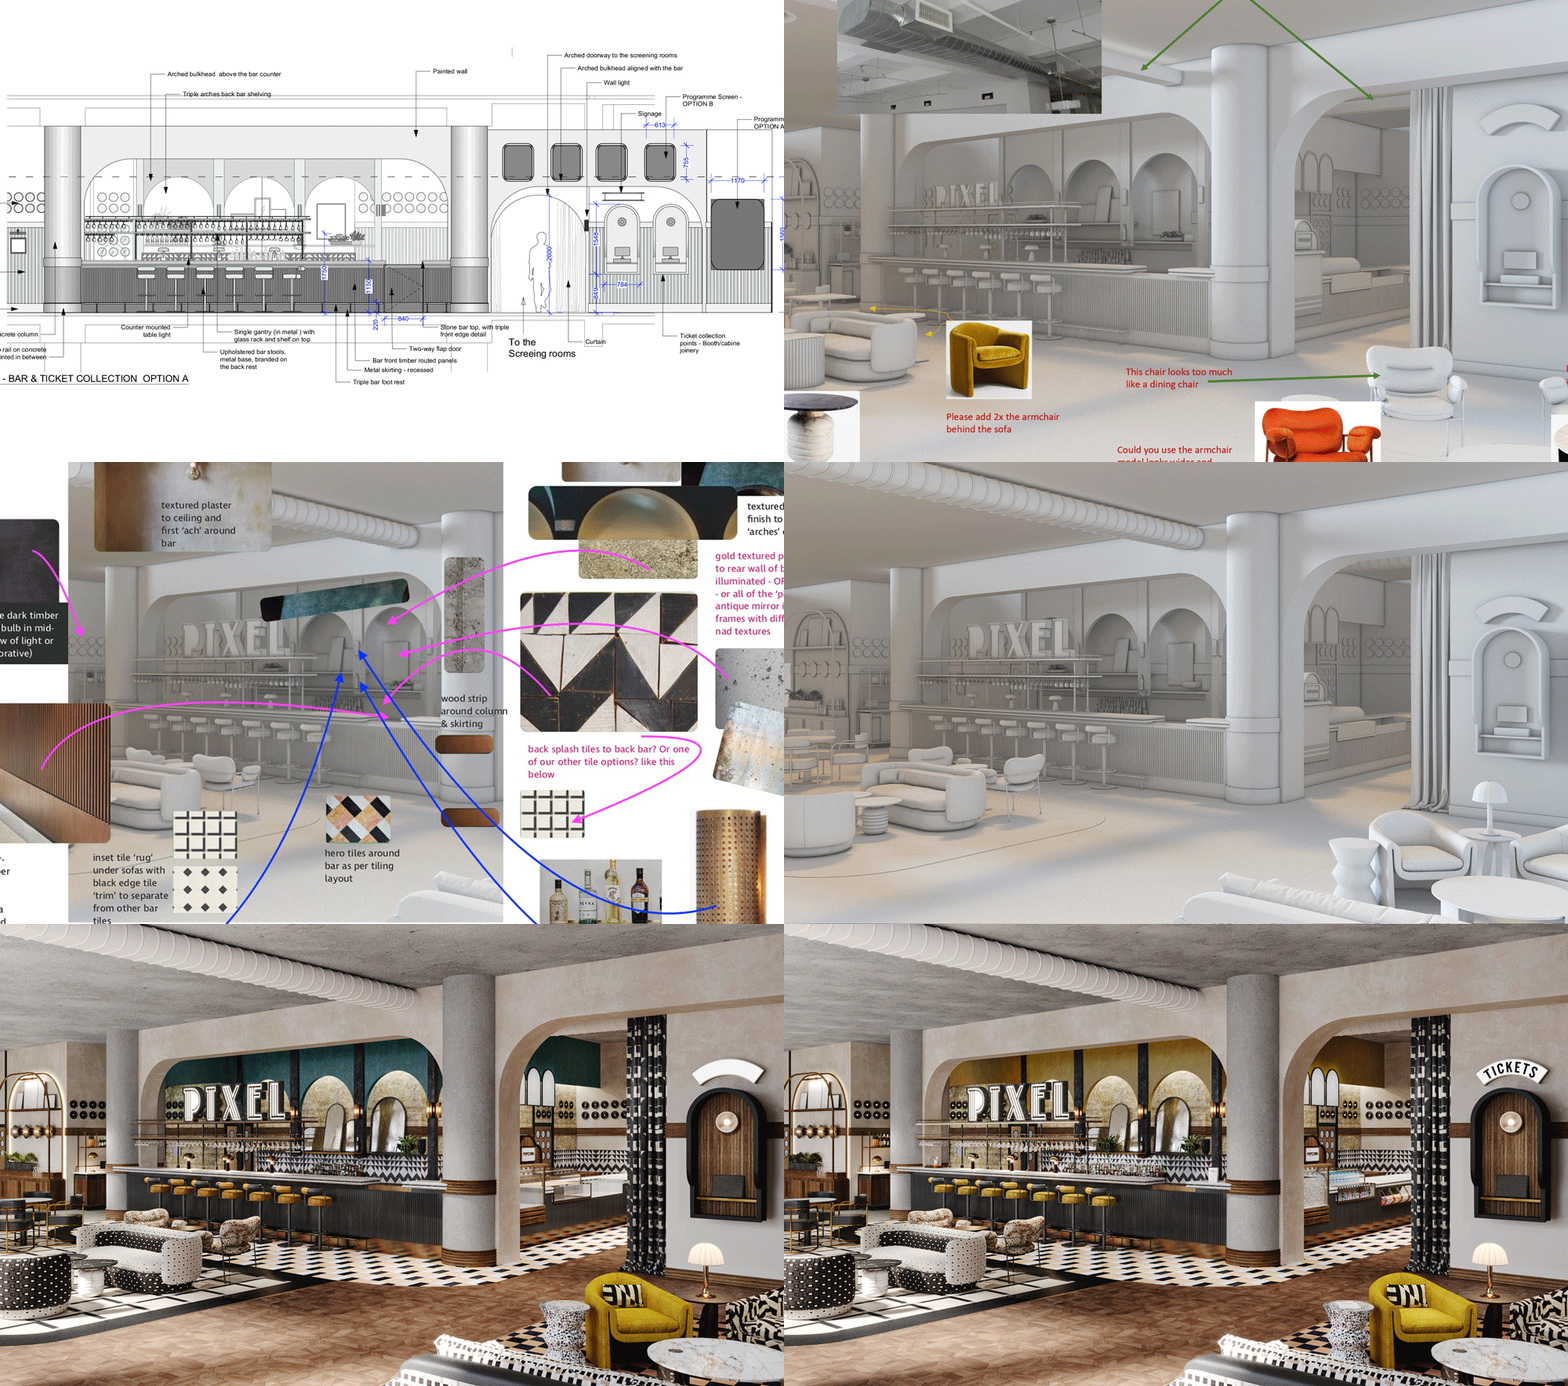
 We then direct our 3D modeller with enough information and creative direction to turn our 2D design into a white ‘clay model’, perfecting the camera angle and nailing the interior architectural details and forms first, the bar, the joinery, the flooring, wall and ceiling details. Only when they are perfect do we then start filling the scene with furniture, decorative lighting, accessories and finishing touches, but still in the clay model, without any colours or textures. Then we move onto applying the finishes, the fabrics, upholstery, tile patters, wood grains, metal effects and patination. The final piece of the puzzle is to set the mood via sunlight, daylight and lighting. Considering beam angles and windows and orientation of the sun within the venue. For our decorative wall lights, table lamps, floor lamps and ceiling lights we set the lux levels to create a beautiful atmospheric layering of light, to show the effect we want to create in the real space when it’s constructed. These CGIs are so essential in helping communicate the design vision to the wider project team of Contractors, Lighting Designers and fabricators, to show them the production values and premium results we expect from the physical manifestation of our design. 3D visuals are also the perfect way to refine the final palette choices before issuing the finished materials and FF&E specifications and control books. Sometimes we make last minute different design decisions based on how things look in these renders. Putting the chosen floor or wall tile or fabric in situ to see if it really works, and swapping out choices where we think we need to add a pop more freshness or a bit more contrast.
Here is a behind-the-scenes creative process video of a render we did last year. This is for our next boutique cinema, which was postponed due to the pandemic.
- AI
- Animation
- Art
- art deco
- Awards
- bar design
- branding
- coffee
- Custom Neon
- Exhibition
- Graphic Design
- great spaces
- hospitality
- hotel
- illustration
- Images
- images that make you stop
- In Conversation with...
- In Venue Graphics
- Inspiration
- interior design
- jobs
- Lighting Installations
- Limited Edition Art Prints
- maps
- miscellany
- Nature
- Neon
- New work
- Opinion Piece
- Our Process
- photoshoot
- Press Coverage
- product design
- residential design
- restaurant design
- shop
- sourcing
- styling
- Taxidermy
- tee shirt design
- The Other Art Fair
- The Studio
- Travels to remember
- Uncategorized
- Video
- Wallpaper
- website design
- window decals
- workspace

